
- Step 1: Choose a Hostinger Plan
- Step 2: Create Your Hostinger Account
- Step 3: Connect or Buy a Domain Name
- Step 4: Set Up Your Website
- Step 5: Set Up SSL Certificate
- Step 6: Optimize Performance
- Step 7: Go Live and Test Your Website
- Step-by-Step Tasks Checklist Table
- Extra Tips for Beginners
- Why Hostinger Is Great for Beginners
- Final Verdict
Launching a website used to feel scary — servers, coding, FTP, databases
But thanks to Hostinger, beginners, businesses, and creators can build a website and make it live in less than 30 minutes!
In this step-by-step 2026 guide, we’ll cover everything you need — from purchasing hosting to getting your site live.
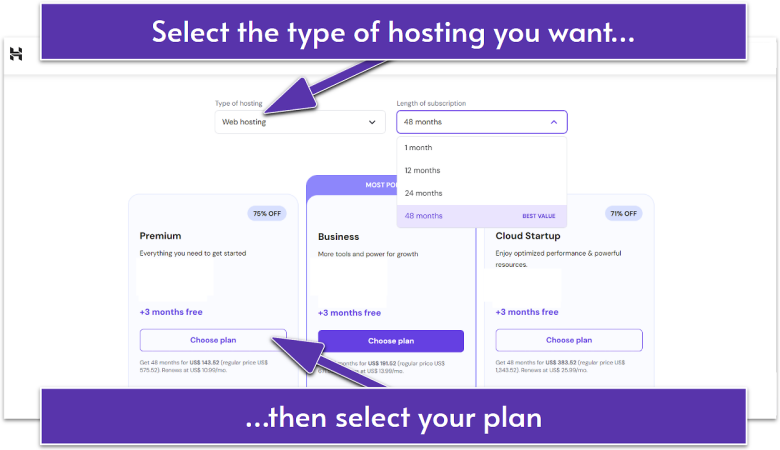
Step 1: Choose a Hostinger Plan
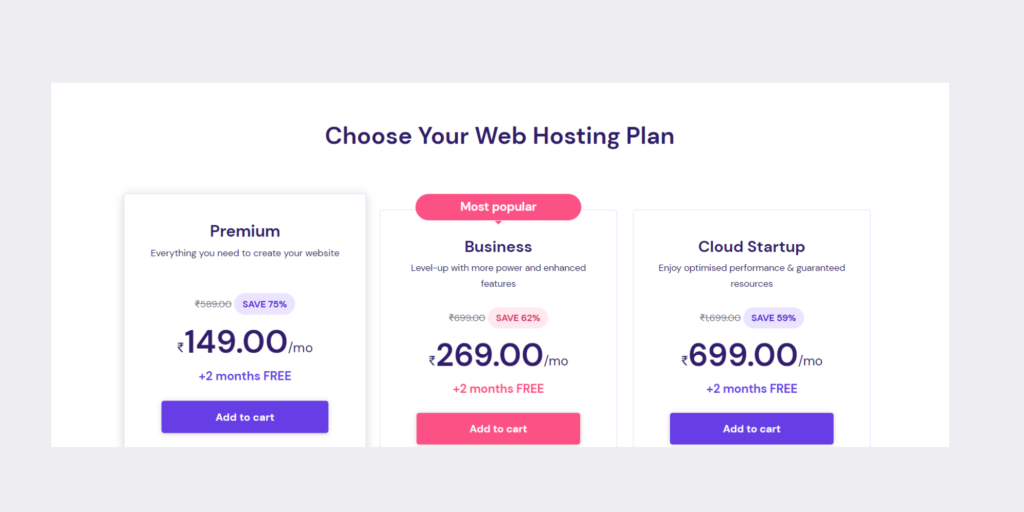
Visit Hostinger.com and choose the hosting type that fits your website:
Popular Options:
- Single Web Hosting – 1 website, beginners
- Premium Hosting – multiple sites + free domain
- Business Hosting – small businesses + more power
- WordPress Hosting – optimized for WordPress users
- Cloud/VPS Hosting – large or growing sites
Pick a plan → Click Add to Cart
Step 2: Create Your Hostinger Account
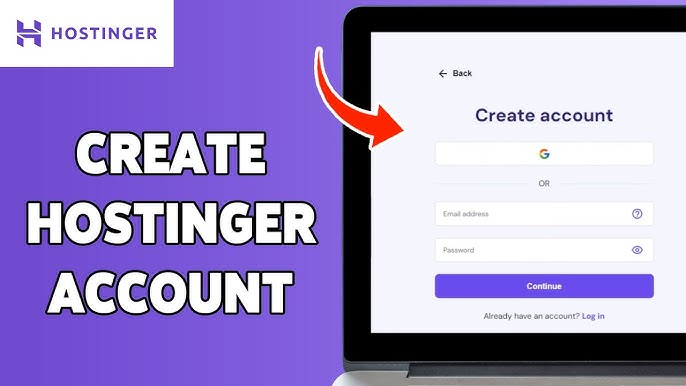
Next, you’ll sign up using:
- Google Account
- Facebook login
Choose a password → Complete checkout.
Now you officially have your hosting!
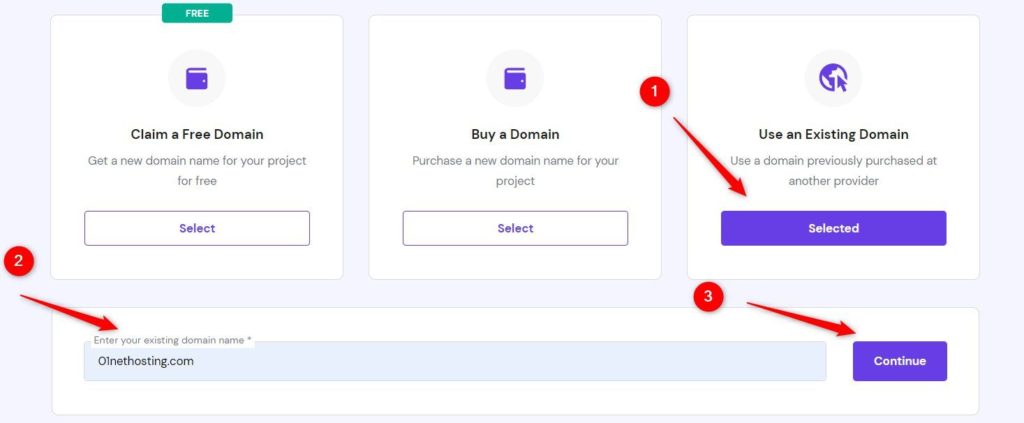
Step 3: Connect or Buy a Domain Name

You have two options:
A) Use Free Domain (Premium or higher plans)
- Hostinger gives free
.com/.in/.neton yearly plans - Search your name → Claim it → Done
B) Connect an Existing Domain

If you bought a domain from Namecheap, GoDaddy, etc
- Go to domain provider
- Replace nameservers with Hostinger’s
ns1.dns-parking.com
ns2.dns-parking.com
3. Save & wait (DNS can take 10 minutes to 24 hours)
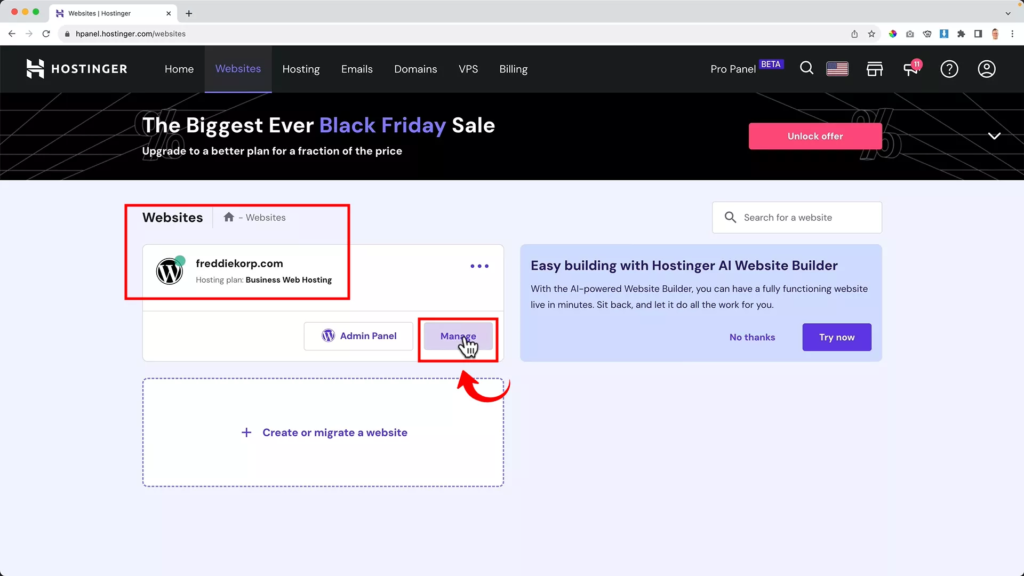
Step 4: Set Up Your Website
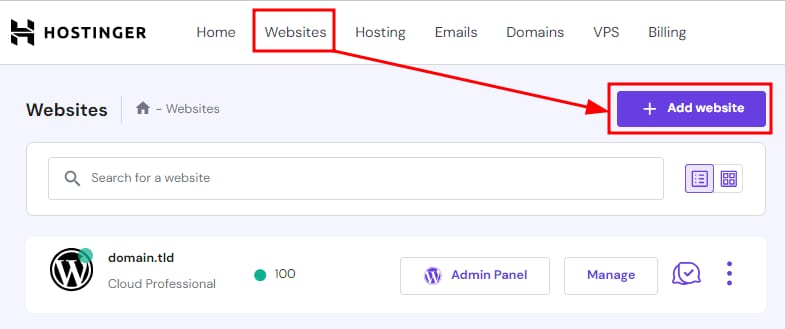
Now the fun part begins — building your website!
You get three options:
Option 1: Install WordPress (Best for beginners)
- Go to hPanel
- Click Auto Installer
- Choose WordPress
- Enter:
- Site title
- Username
- Password
- Click Install
WordPress will be ready in 1–2 minutes!
Option 2: Use Hostinger Website Builder
If you want drag-and-drop editing:
- Select Website Builder
- Pick a template
- Edit and publish — no coding needed
Option 3: Upload Files Manually
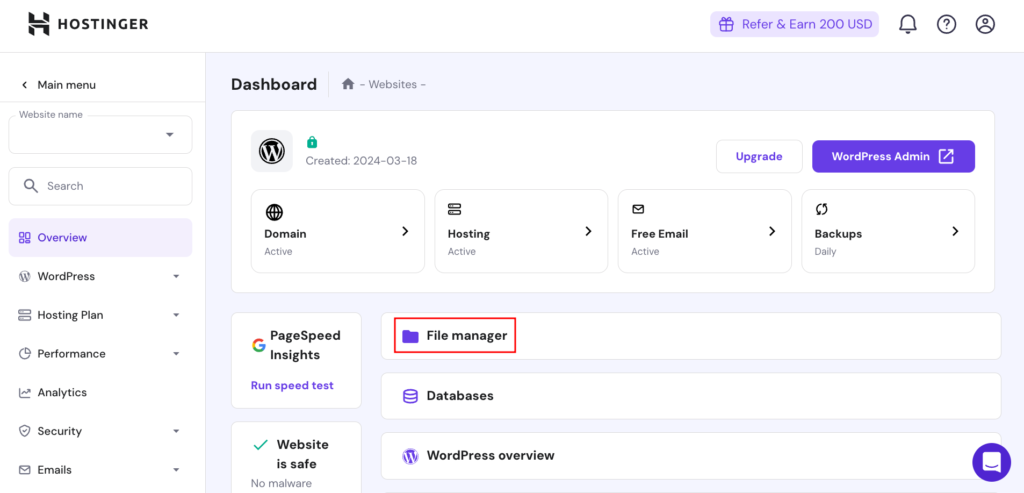
For custom-coded sites:
- Open File Manager or use FTP
- Upload index.html, CSS, JS, etc.
- Add database if needed
- Save & publish
Step 5: Set Up SSL Certificate
Google trusts secure websites — Hostinger gives FREE SSL.
Steps:
- Go to SSL
- Activate Install SSL
- Refresh your site → It now starts with https://
Step 6: Optimize Performance
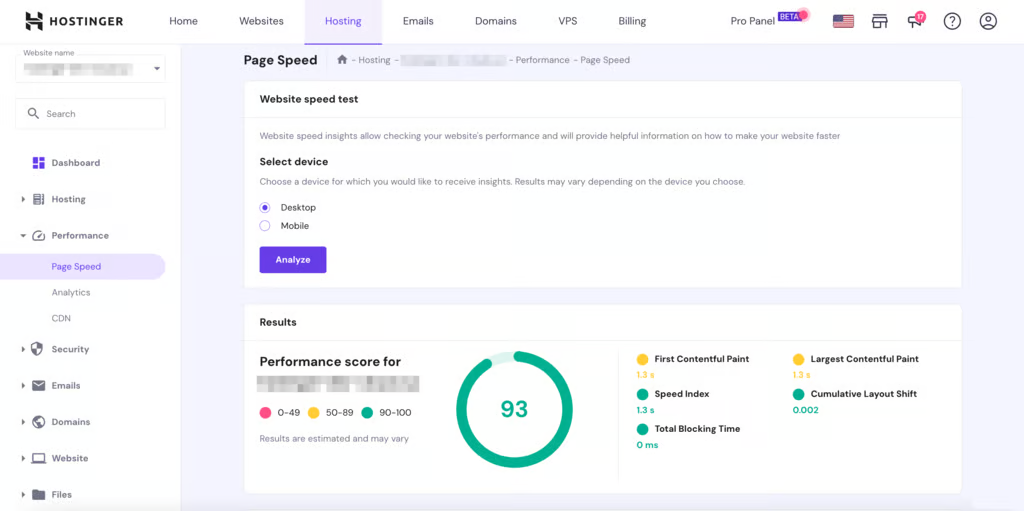
Make sure your site loads fast:
- Turn ON LiteSpeed Cache
- Activate CDN if your plan includes it
- Enable automatic backups
- Update your WordPress themes & plugins regularly
This improves speed, SEO, and security!
Step 7: Go Live and Test Your Website
Visit your domain:
🌐 www.yourdomain.com
- Check pages
- Test menus
- Try mobile view
- Make sure SSL lock icon is visible
Congratulations — your website is now LIVE
Step-by-Step Tasks Checklist Table
| Step No. | Task Name | What You Do | Helpful Link |
|---|---|---|---|
| 1 | Choose Hosting Plan | Select Single / Premium / Business | https://www.hostinger.in |
| 2 | Create Account | Sign up using email or Google | https://hpanel.hostinger.com |
| 3 | Add/Connect Domain | Buy free domain or change nameserver | https://www.hostinger.in/tutorials |
| 4 | Install WordPress | Use Auto Installer → WordPress | https://www.hostinger.in/tutorials/install-wordpress |
| 5 | Activate SSL | Turn on SSL from hPanel | https://www.hostinger.in/tutorials/how-to-install-ssl |
| 6 | Build Your Site | Choose theme & design pages | https://wordpress.org/themes |
| 7 | Publish and Test | Visit your URL and check pages | https://www.whynopadlock.com (SSL checker) |
Extra Tips for Beginners
- Install SEO plugin (Rank Math or Yoast)
- Add a contact form
- Connect Google Search Console & Analytics
- Backup weekly for safety
- Avoid too many plugins → slows down site
Why Hostinger Is Great for Beginners
- Affordable pricing
- 1-click installs
- Free domain (on most plans)
- User-friendly hPanel
- Powerful performance
- 24/7 customer chat support
Hostinger is beginner friendly but scalable if your business grows.
Final Verdict
Hosting a website on Hostinger in 2026 is:
- Fast
- Affordable
- Simple
- And perfect for personal, business, or professional projects
Whether you’re starting a blog, online store, or portfolio, Hostinger makes it possible in just a few clicks.
This guide is for educational purposes. Pricing and features may change — always confirm on Hostinger’s official website before purchasing.
Hostinger Plans Comparison Table
| Plan Name | Suitable For | Key Features | Starting Price | Official Page |
|---|---|---|---|---|
| Single Web Hosting | Personal blogs & hobby sites | 1 website, 50GB SSD, Free SSL | ~₹149–199/mo | https://www.hostinger.in/web-hosting |
| Premium Hosting | Multiple websites & beginners | Free domain, 100 websites, email, SSL | ~₹249–349/mo | https://www.hostinger.in/web-hosting |
| Business Hosting | Small businesses & pro sites | Free domain + daily backups, faster performance | ~₹349–449/mo | https://www.hostinger.in/web-hosting |
| Cloud Startup | E-commerce & growing brands | Dedicated resources, 3x faster, easy scaling | ~₹699–899/mo | https://www.hostinger.in/cloud-hosting |
| VPS Hosting | Developers & custom projects | Full server control, root access | ~₹399–699/mo | https://www.hostinger.in/vps-hosting |
#HostingerGuide #WebHosting #Carrerbook#Anslation#HostWebsite #WordPressSetup #Hostinger2026 #DigitalStartup